A Guide to Maintaining Your Sump Pump

A Guide to Maintaining Your Sump Pump

Sump pumps are devices used in basements and similar building areas to remove excess water that could lead to flooding. Depending on the specific needs of your home, sump pumps can be relatively inexpensive or can cost thousands of dollars. In the case of the latter, it is imperative to maximize the lifespan of your unit, but even in the case of the former, it is crucial to ensure that your sump pump works as well as it can when you need it. With that in mind, let us explore the actions that you may want to take on a monthly, quarterly, and annual basis to keep your pump running well and to lower your total cost of ownership.

Monthly Sump Pump Inspection

One of the most common questions related to residential sump pumps is whether or not a monthly inspection is required, and the answer is that it depends. Let us start by saying that at least a cursory examination each month is not a bad idea in order to catch any obvious issues as soon as possible. The exception is if you use your sump pump to dispose of water from a washing machine. If you do, then it is highly recommended that you clean the pump screen and the inlet opening, and once you have done that, you might as well perform all of the steps outlined for quarterly upkeep since the unit is unplugged and removed.

Quarterly Sump Pump Maintenance

At the bare minimum, you will want to perform routine maintenance on your sump pump every three months. Furthermore, you should set up your maintenance schedule so that you are performing maintenance in advance of heavy periods of use. You can schedule a professional technician to perform the quarterly maintenance, and we absolutely recommend that to any homeowner who does not feel comfortable working with this equipment. That said, the quarterly upkeep is not too involved. Most homeowners can do it themselves and can then call in a pro if they discover a problem.

Annual Professional Maintenance

No matter how comfortable you are with your sump pump, we highly recommend scheduling a licensed plumber to perform the annual maintenance. As we will discuss below, the annual maintenance is a bit more involved, and it provides you peace of mind that a plumber has signed off on your system.

Prepare the Pump for Routine Maintenance

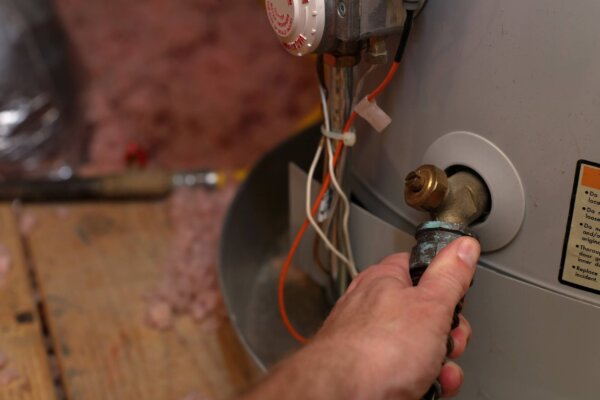
When you perform a cursory inspection, such as each month, it is fine to keep the sump pump plugged in and in place. However, whenever you are going to handle the pump, you should first unplug the unit. You can then remove the pump from the basin, which is also referred to as a pit. We like to wrap the pump in plastic and then set it aside in a clean and safe place.

Clean the Sump Basin and Inlet

Empty the basin of any standing water. There may be debris in the basin, and depending on where you are emptying the basin, you may want to use a screen or another filter to block the debris. Once the basin is empty of most of the water, remove as much of the debris as you can and dispose of it. You can then rinse out the basin and wipe it out with a cleaning rag. You should also check the inlet and clear away any matter that has accumulated on it.

Examine the Sump Pump for Corrosion or Other Signs of Damage

The next step is to clean the sump pump itself. While you are cleaning it, examine the unit for any potential defects and any signs of rust or corrosion. If you do notice a crack or another flaw, you may need to call in a plumber to assess it. If you find rust or corrosion, your next step will depend on the amount of damage and the age of the sump pump. Minor accumulate can be removed with a brush and an acidic cleaner. However, be mindful that rust and corrosion can clog the system, so if the accumulation is significant and/or this is an older sump pump, it may be time to replace it.

Check the Alarms if Applicable

Not all sump pumps need an alarm, and if yours does not have one, then you can simply skip ahead. Furthermore, if you are doing quarterly maintenance as opposed to the more extensive once-a-year maintenance, you can skip ahead to checking the backup power source. Your sump pump may have a low-water alarm and/or a high-water alarm, and you should test them both per the manual.

Lubricate Unsealed Bearings

Sump pumps with sealed bearings do not need lubrication, and you can skip to the next step. If you are unsure, check the owner’s manual. If your bearings do need lubrication, make sure to use the recommended oil or grease as indicated in the manual.

Inspect the Sump Pump Discharge Pipe

Fill a 5-gallon bucket with water. Reinstall the sump pump into the basin. Empty the contents of the bucket into the basin. Observe the entire action of the float switch. The switch should travel its entire range without binding, and it should turn the sump pump on and off at the appropriate times. Once the sump pump has appropriately turned off, inspect the pump discharge pipe. Ensure that it is not obstructed, such as by dirt or vegetation. You must also ensure that the pipe is draining fully. If it is not, the inner obstruction must be cleared because any standing water could rupture the pipe during winter.

Check the Backup Power Source

A backup power source may not be relevant to your particular setup. In areas prone to extreme weather conditions, power outages are more common, and backup power sources are used. If you have a backup power source, this is a good time to ensure that the sump pump can run on it. To do so, enable the battery, and repeat the step above involving the 5 gallons of water.

Inspect the Cover

Ensure that everything is in place, and clean up your work area. If everything is in order, it is time to put the lid back and to move on to the next project. Take a moment to assess the lid and to look for any imperfections, and, lastly, ensure that it fits into the basin with a snug seal.

Your Sump Pump Experts in Sacramento

Crystal Blue Plumbing, Heating and Air is a locally owned and operated company that has served Sacramento and the surrounding areas since 1976. In addition to sump pumps, our licensed plumbers specialize in rooter services, drain repair, pipe repair, camera inspections, toilets, showers, tankless water heaters, standard water heaters, garbage disposals, and sewer repair. Our team also includes licensed HVAC technicians who can install, service, and repair all manner of ducted and ductless heating and cooling equipment, and we have IAQ experts who specialize in ventilation, air filtration, and air purification. Call or contact us online to learn more about these services or to book an appointment.

8 Steps to Flushing Your Water Heater

8 Steps to Flushing Your Water Heater

Water heaters have a sizeable tank meant to ensure a constant water supply. However, the unit will lose its efficiency with time, especially if you fail to clean the tank often. Mineral sediment and scale may begin to build up, forming a thick coating over the heating element. This diminishes heat transfer to the water and leads to energy waste. When you continue to use the water heater in this condition, the sediment may break up and begin to flow through the pipes, causing a clog. Therefore, you should clean and flush your water heater tank after one or three years, depending on your water source and your unit’s model. However, if you haven’t cleaned the tank for years, you should have a professional handle it because the flushing process could cause leaks. Otherwise, follow the procedure below to flush your water heater.

1. Turn Off the Unit

Before flushing the tank, you need to look for the power source and turn it off to create a safe environment. If you are using an electric water heater, locate the breaker or fuse box, a small panel with a swing door attached to a wall in the garage or outside the house. Once you open up the box cover, you should see small switches, and if you can’t identify the exact one that powers your heater, shut off the main circuit breaker. If you find a tube with metallic ends after opening the panel, you have a fuse box. In this case, you need to unfasten and take out the fuse powering the water heater. If you can’t determine the exact one, pull out the handle at the top of the panel to shut off the power to the entire house.

On the other hand, if you have a gas-powered water heater, look for a red knob at the section where the gas pipe enters the unit. It has “On,” “Off” and “Pilot” settings. Turn it to the “Off” position.

2. Stop the Cold Water Supply

Turn off the inlet valve to cut the cold water supply to the tank. If the pipe has a ball valve, give it a 90-degree turn. A lever-like valve should be turned perpendicular to the line. If you leave the water flowing into the unit while flushing, it makes the process messier, and you will incur high bills.

3. Give the Water Time to Cool

Give the water in the tank ample time to cool before flushing. Handling hot water can lead to scalding, so leave the tank for one to two hours after turning off the heating element. If you intend to use the collected water for other purposes, let the tank cool overnight.

4. Open a Hot Water Faucet

Note that during the flushing process, a vacuum may form in the pipes. To avoid this, open a hot water faucet in your house and leave it running throughout the flushing process. This will also help the water drain faster.

5. Attach a Hose to the Tank

Next, determine where you want to drain the water and fit a hose to the drain cock or valve. Fix the hose firmly to prevent leaks. If you don’t have a garden hose, you can drain the water into a container, but you will have to let it cool adequately. Be careful with the type of hose and container you use for the draining task. A low-quality material may soften and leak due to the heat.

6. Turn on the Spigot and Drain

Extend the hose to a safe place where you can discharge the water. This could be an outside drain, the sewer line or the driveway. Open the water heater’s drain valve to let out the water. You can also open the pressure valve to allow the water to flow out more freely. Before opening the pressure valve, remember to put a container under it to collect the dripping water. The water may appear a bit brownish from sediment. For a tank that has too many deposits, you will need to drain it completely.

7. Flush the Tank

Put the draining water in a bucket, leave it for some minutes and observe. If the water draining out is still unclear, open up the cold water valve. This will help rinse out any sediment at the bottom of the tank. Let the water run for a few minutes. Flush until you have little or no residue coming out with the water, and then turn off the cold water supply.

8. Finish Up and Restore the Unit’s Power

Once you finish flushing, disconnect your garden hose. Use a wet/dry vacuum to suck up any sediments that could be at the opening. Shut off the drain valve. Next, turn off the hot water spigot and the pressure relief valve as well. Refill the water heater tank with clean water. Once the pressure stabilizes, slowly open the pressure relief valve to remove the excess air, and then close it. Open a hot water spigot and let it run for some time to get rid of any air remaining in the system. At this point, only cold water should come out.

Once the hot water tap begins to run at full volume, it’s safe to restore the power. Turn the gas supply back on, flip the circuit breaker or replace the fuse. Remember also to reset the thermostat to your preferred settings. Give the heater about twenty minutes, and then turn on a hot water tap. Observe how the water heater functions and test the water temperature.

Professional Water Heater Draining Services

Flushing your water heater often increases its efficiency and longevity. Whether you use hard or soft water, the unit collects a significant amount of sediment. This increases the risk of tank damage, clogs the waterline and limits the amount of water available in your tank. There are various signs that you need to flush your unit. If your tank produces some strange noises, this is an indication of sediment accumulation. When you run your water heater, the particles hit against one another, making some rumbling sounds.

Don’t ignore foul odors or a rusty color in your water. When you neglect the tank, bacteria begin to build up, and your water quality deteriorates. Have an experienced plumber clean the tank and sanitize it to eliminate the nasty smells and lower the risk of infection. Sediment also leads to corrosion, which may change the color of the water. Pay attention to changing water temperature. If your heater begins to produce colder water, it could be due to dirt accumulation at the heating element or in the pipes. In addition, flush your tank if it heats up slowly or if you notice that the hot water doesn’t last long.

If you aren’t confident flushing your water heater tank on your own, don’t hesitate to contact Crystal Blue Plumbing Heating & Air. We provide reliable plumbing, air conditioning, and heating services to the people of Loomis and the entire Sacramento area. Our company also offers whole-house fans, humidifiers, dehumidifiers, UV lights, ductless systems and indoor air quality service. Of course, we install, maintain and repair all these systems. Reach out to our reliable team today and schedule an appointment.