
Digging Deep or Going Trenchless: What Works Best for Your Pipes?
Replacing a sewer line comes with more decisions than most homeowners expect. The method you choose affects your yard, your time, and your budget. Whether you’re dealing with aging clay pipes or a sudden collapse, you’ll need to weigh the pros and cons of trenchless repairs like pipe bursting against conventional digging. Crystal Blue Plumbing Heating & Air in Sacramento, CA helps homeowners make this choice every day. This article breaks down the trade-offs clearly.
Digging Up the Past Comes With a Cost
Traditional sewer line replacement starts with excavation. Crews dig a trench from your home to the main line, pulling up sections of pipe along the way. That trench cuts through whatever happens to be in its path, driveways, patios, sidewalks, landscaping, you name it. If the pipe runs beneath your garden, that’s coming up, too.
In some cases, excavation is the only option. If the line is completely collapsed, severely offset, or buried alongside utility lines, contractors need direct access to fix the problem. Still, traditional digging usually takes more time and creates more disruption. The work itself might take a few days, but the cleanup and restoration often stretch on for weeks.
For older homes, the risk includes not just cost but complexity. Original plumbing may be buried deep or laid through tight areas where access equipment can’t fit. In those cases, trenchless methods may be more efficient and less destructive.
Pipe Bursting Doesn’t Leave a Mess Behind
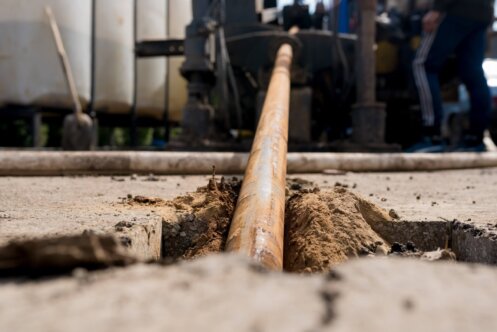
Pipe bursting is a trenchless method that replaces the old pipe without removing it from the ground. Instead, a conical head pulls a new pipe through the existing line while fracturing the damaged one. It’s a clever workaround for homes with landscaping or hardscaping you don’t want to lose.
The process starts with two access points, one where the pipe begins and another where it connects to the main. From there, a cable guides the bursting head and replacement pipe through the damaged section. As it moves forward, the old pipe gets broken apart, and the new pipe takes its place in the same tunnel.
This trenchless sewer repair method works well for many common problems like root damage, cracks, or corrosion. Because the job doesn’t require full excavation, it usually takes less time and leaves the yard looking mostly untouched. It’s not always an option, though. If the existing pipe has collapsed completely or shifted out of line, it may be too unstable for pipe bursting to work safely.
How Your Yard Influences the Method
The layout of your property plays a bigger role in sewer repair than most people expect. If your pipe runs beneath concrete, pavers, retaining walls, or other hard surfaces, digging them up could cost more than the repair itself. Even grass-covered yards pose challenges if large trees sit directly above the line.
Pipe bursting sidesteps most of these issues by sticking to two small access points. That’s often a win for anyone with mature landscaping or built-in features. Traditional digging, by comparison, cuts through anything in the way and might require permits or special equipment for hard surfaces.
That said, not every yard supports pipe bursting. If there’s not enough space for the bursting equipment or the line runs through a tight or unstable slope, excavation might be safer. Sloped properties with rocky soil or high water tables can complicate trenchless work and make digging more practical.
Time and Labor Shape the Overall Cost
People tend to think trenchless options cost more because of the newer technology. In some cases, that’s true, but the math changes fast when you factor in labor, restoration, and project length. Traditional digging may require more crew hours, more equipment, and more time on-site, all of which raise the total cost.
Pipe bursting might cost more per foot in materials, but the overall job usually wraps up faster. Without the need to dig and refill a long trench, there’s less manual work and less waiting around. Crews can often complete the job in a day or two.
Pipe Material and Age Can Change the Decision
What your old pipe is made of will affect how easily it can be replaced. Clay pipes, which were common before the 1970s, tend to crack and shift with soil movement. Cast iron corrodes from the inside out. Orangeburg, a tar paper-based pipe, often collapses completely after decades underground.
Pipe bursting usually works best when there’s a continuous channel to follow. If the original pipe has completely crumbled or collapsed in places, the bursting head may not be able to move through it. In those cases, digging provides a clearer path and allows for visual inspection during the job.
If your home has modern PVC or ABS that’s damaged in one area but stable elsewhere, trenchless repair may be the faster fix. Some systems even allow for partial replacement using trenchless techniques. Still, an inspection camera is the only way to see what’s happening underground and make the right call.
Soil Type and Terrain Change the Game
Not all dirt behaves the same way. Soft, sandy soils are easier to dig and fill, which can lower excavation costs. Rocky or compacted clay soil slows everything down and makes trenchless repair more appealing. If your yard has large boulders or heavy roots, the crew may have to bring in additional tools or shift methods entirely.
Terrain also changes the risk. Hillside homes and properties with drainage challenges often present safety issues during traditional digging. A trench dug on a steep slope can collapse or flood, especially after rain. Pipe bursting keeps the surface mostly intact, which reduces risk in sloped or water-heavy areas.
Permitting and Local Codes Might Limit Your Options
Even if trenchless repair sounds better to you, your local building department has a say in what’s allowed. Some towns limit where and how trenchless methods can be used, especially near shared lines or easements. Others may require detailed pre-approval for pipe bursting, especially if the original pipe is near water mains or electrical lines.
Traditional excavation is more universally accepted and often easier to permit, especially for full replacements. Crews can show exactly where the pipe is and confirm alignment as they go. In contrast, trenchless work moves underground, which makes inspections harder without specialized tools.
Some areas require a highly-licensed plumber on-site for trenchless jobs, even if a different crew handles the labor. Others limit trenchless options for pipes that run under public sidewalks or streets. Before deciding, it’s worth checking whether your city or county has trenchless-friendly policies in place.
When a Hybrid Approach Makes More Sense
Not every job fits neatly into one category. Sometimes, a hybrid approach offers the best results. If part of your pipe is in decent shape but one section needs replacement, crews might dig that portion and use trenchless tools for the rest. That cuts down on damage while still addressing the worst areas.
Other times, pipe bursting works well for the main run, but excavation is needed near bends, offsets, or structural obstacles. Combining the two methods lets plumbers control costs, shorten timelines, and reduce risk without committing to one method the entire way.
Schedule Your Sewer Line Inspection Now
The way you replace your sewer line changes everything about the process. Pipe bursting skips the mess but comes with its own requirements. Traditional digging still has its place, especially when conditions call for it. Knowing what fits your home, your soil, and your budget gives you more than working plumbing. It gives you confidence in the repair.
For sewer line replacements, inspections, or trenchless repairs, schedule a visit with Crystal Blue Plumbing Heating & Air and see what method makes the most sense.